How I Got Into Beading (and Why You Don’t Even Need a Loom)
I found the macaw by accident. I was deep in the artwork for Venezuela para Colorear, our colouring book, surrounded by tabs of parrots and tricolour flags and mango trees, when a pair of beaded macaw earrings drifted past on Pinterest. Bright red, that unmistakable yellow face, a tail like a tiny rainbow. I stopped.
Around the same time my daughter had just learned to say guacamaya. If you have ever heard a small child say guacamaya, with the whole word rolling out proud and slightly wrong, you will understand why I decided, more or less on the spot, that I was going to make a pair of beaded macaws for my birthday.
So I ordered some beads and sat down to make them. And I failed instantly.
Here is the thing I want to save you from. I make jewellery. I assumed that meant I could bead. I figured I would look at the pattern, follow the logic, thread the beads through in the sensible order and a macaw would appear. Amiga, it did not. I had bought cheap round beads from a mixed bag, the kind where no two are quite the same size. I had never heard of Miyuki. I did not know that beadwork lives or dies on the beads being identical little cylinders. I did not know how many beads a pattern needed, or how to turn “164 burnt orange” into “how many 5g tubes do I put in my basket.” I had none of the knowledge and all of the confidence, which is the worst possible combination.
So I stopped, and I did what I always do when a craft humbles me. I researched it properly, from the beginning.
The main ways to make flat beaded designs
When you look up beading you get hit with a wall of words: peyote, brick, herringbone, right-angle weave, loom, square stitch. It is genuinely offputting. Let me narrow it to what matters if what you want, like me, is to make flat charted designs like a macaw or a little pendant.
There are more bead-weaving stitches than these, but for flat pixel-style pictures, a few names come up again and again.
Loom beading. You warp a little loom with threads, then run rows of beads across on a needle. The beads sit in a perfect square grid, directly on top of each other. The loom holds the tension for you, which is lovely, but you have to own and set up a loom, and you finish with a lot of warp threads to weave in at the end.
Square stitch. This makes the exact same square grid as a loom, with the beads stacked in straight columns and rows, but you do it with just a needle and thread, no loom at all. Instead of weaving across warp threads, you stitch each new bead to the one below it. To look at, the finished piece is identical to loom work. This is the one I settled on, and the one this post is really about.
Brick stitch. Each bead is stitched to the thread bridge between two beads in the row above, so the rows stack like brickwork, offset by half a bead each time. This is what most of those macaw earrings are made in. It gives a naturally shaped edge, which suits wings and tails, but the offset grid takes more getting used to.
Peyote stitch. Beads sit in an offset grid like brick stitch, but you add them in a different rhythm, every other bead, so rows interlock as you go. Brick and peyote are actually the same fabric turned ninety degrees, which is why so many patterns say “brick or peyote,” and why a chart for one works for the other if you rotate it.
I read all of this, looked honestly at my zero hours of experience, and made a decision.
Why I chose square stitch
I went with square stitch, and I would happily point a beginner the same way.
Here is the reasoning. I wanted the neat square grid, because it means a graph-paper design drops straight onto your beadwork with no mental gymnastics: one square, one bead. Loom gives you that grid too, but it asks you to buy a loom, warp it, and then deal with all those warp threads at the end. Square stitch gives you the identical result with a needle, a reel of thread and nothing else. I could start that same evening with what was already on my table.
Square designs are also forgiving. A slightly wonky bead in a geometric pattern hides far better than a wonky bead on the curve of a parrot’s beak. So my plan was simple. Start square. Build confidence. Work up to the macaw once my hands knew what they were doing.
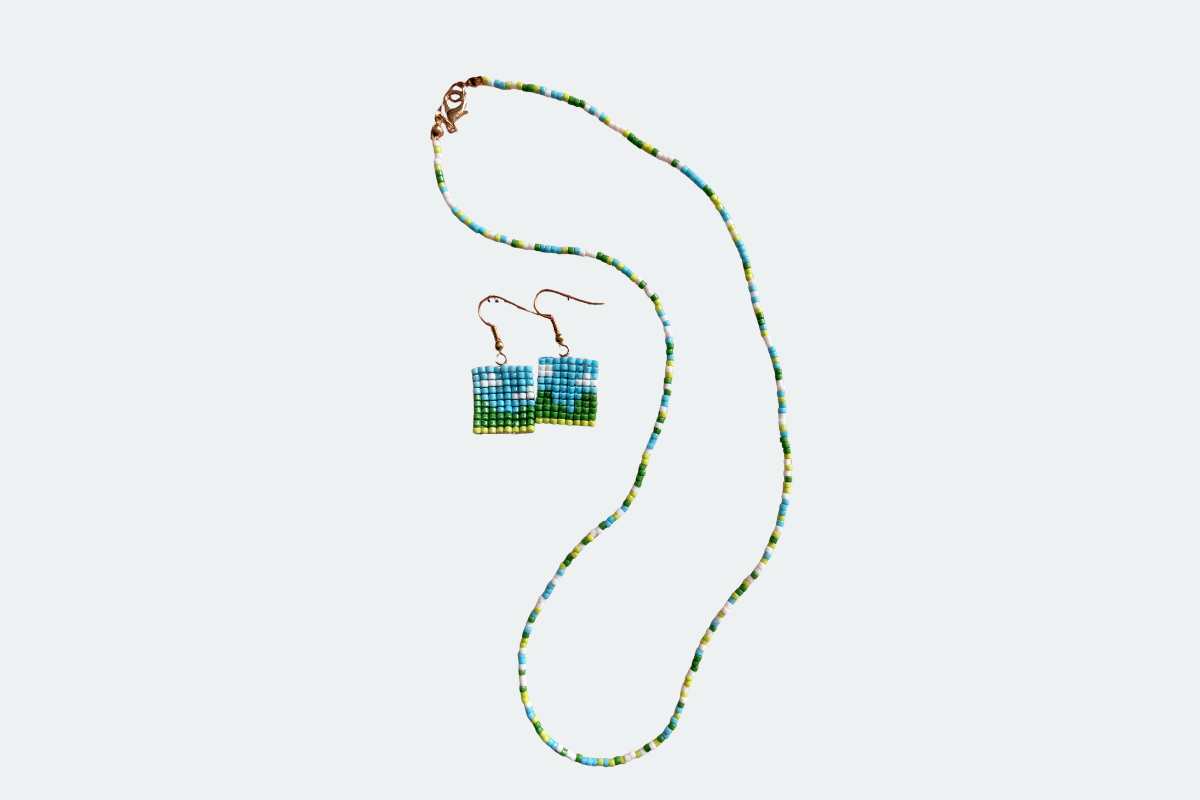
What I did not expect is that I would fall for the square pendants themselves. I have made a whole run of them now, little woven tiles, each one a different colourway and pattern. They became their own thing rather than a stepping stone, which is the nicest kind of surprise a new craft can give you. The macaw is still coming. But I am in no rush now, because the “practice” turned out to be the fun.
If you would rather use a loom, everything else in this post still applies, the beads, the materials, the design grids, all of it. The only real difference is how the rows get held together while you work.
How square stitch actually works
Before you buy anything, it helps to see what you are letting yourself in for. It is genuinely simple once you see it laid out, and there is a real satisfaction in how the grid locks together.
Caramba Crafts · Beading basics
Square Stitch, Step by Step
The off-loom way to make a neat square bead grid, with nothing but a needle and thread. This is the stitch behind those little woven pendants.
Thread your first row
String your first row of beads in order, just as your pattern shows. This bottom row sets the width of your whole design. Snug them up against each other.
Add the first bead of row two
Pick up one new bead. Sit it directly on top of the last bead of the row below, then pass your needle back down through that lower bead and up through the new one again. That double pass is what locks them square.
Repeat all the way across
Add each following bead the same way, one at a time, each sitting on the bead below it. Every bead gets that up-and-down stitch. The row builds across in a straight line, no offset.
Build row on row
Turn and start the next row on top of the last, working back the other way. Keep going and a neat square grid grows, column by column, exactly like loom work but with no loom to warp or unwarp.
One square = one bead. This is why a coloured-in grid becomes a pattern you can bead directly.
carambacrafts.co.uk · made one? tag @caramba.crafts
The whole stitch is that little up-and-down pass, repeated. String a first row to set your width. Then every new bead sits on top of the bead below it, held with a stitch that goes up through the new bead, down through the one beneath, and up through the new one again. That double pass is what keeps the columns straight. Build row on row and a tidy grid appears.
A still picture can only take you so far, though, so when you are ready to actually pick up a needle, watch a video alongside it. Seeing the thread move is worth a hundred diagrams. Search “square stitch beading for beginners” and you will find plenty of good ones.
Why Miyuki beads, and what that even means
This is the single biggest thing I got wrong, so let me be clear about it.
Cheap craft beads, the mixed bags you find in the children’s craft aisle, are not made to a consistent size. Some are fat, some are thin, some have holes off to one side. When you weave with them the whole piece goes lumpy and the rows refuse to line up, because each bead is a slightly different width. No amount of skill fixes bad beads.
Miyuki is a Japanese bead maker known for precision, and their Delica beads are the ones you want for this kind of work. Delicas are cylinders, not rounds, milled to a very consistent size. Because they are cylindrical they sit flush against their neighbours, edge to edge, like tiny bricks. That is what gives beadwork that crisp, pixel-sharp look where the picture reads clearly. Two beads of the same Delica colour are, to the eye, identical.
The standard size for pendants and earrings is Delica 11/0. There is a smaller 15/0 for fine detailed work, and if you see “DB” followed by a number, like DB0722, that is simply Miyuki’s code for a specific colour. Patterns list those codes so you can buy the exact shade the designer used.
Toho is the other big Japanese maker and their beads are excellent too, so this is not a one-brand rule. The rule is: uniform cylinder beads from a proper seed-bead maker, not the cheap mixed bag I started with.
What you actually need to make a start
You do not need much to begin, and you do not need to spend a fortune. Because square stitch needs no loom, the list is even shorter than you might expect. Here is the honest starter kit.
Miyuki Delica 11/0 beads. Pick a few colours you like. They are usually sold in tubes of around 5g or 7.2g, and one small tube holds hundreds of beads, plenty for several small pendants. My advice from bitter experience: buy a little more of any colour you cannot easily reorder, because running one bead short near the end is a special kind of heartbreak.
Beading needles, size 12. These are long, thin and flexible, made to pass through a bead hole several times. Buy a pack, because you will bend one eventually.
Beading thread. Nymo in size O or B, or a braided thread like Fireline. White or grey thread disappears into most designs, so you do not need a rainbow of thread colours.
A bead mat. A scrap of that fuzzy velvet-like fabric that stops beads rolling off the table and into the abyss under the sofa. Small thing, enormous difference.
Findings. Whatever turns your woven piece into jewellery. For pendants that is a bail or a jump ring and a chain. For earrings, ear wires. Small, cheap, easy to forget in the first order.
Small scissors and a bit of patience and that is genuinely it. You can start beading for well under twenty pounds. And if you decide later that you want to try loom work too, a simple metal-frame loom is only a few pounds to add.
The bead gram calculator further down this post is there for the moment you have a design and need to work out how many grams, and therefore how many tubes, to buy. It is the tool I wish I had had on day one.
Now design your own
This is my favourite part, and it is where I want to hand things over to you.
Once you can weave a square, you do not need anyone else’s pattern. You can design your own, and it is far easier than it sounds, because a square-stitch design is just a coloured-in grid. One square on the grid equals one bead. That is the whole system, and it is exactly why the infographic above ends where it does.
I have made two free printable grids you can download and use to plan your own pieces. They are sized for cylinder beads, so what you draw comes out at the true finished proportion rather than looking right on paper and wrong in beads.
The pendant practice sheet has nine small grids on one A4 page, each seven beads wide by ten beads long, which is the size of the little square pendants I have been making. Print it and you have nine designs’ worth of planning on a single sheet. Good for trying colourways quickly.
The big design grid is a single large fifty by fifty grid with heavier guide lines every ten beads so you can count your position easily. This one is for when you want to plan something larger, or just see a whole design mapped out before you commit a single bead.
Two ways to use them. The old-fashioned way is to print the sheet and colour each square with pencils or felt tips, one square per bead. I still do this on the sofa in the evening, it is very calming. The other way, if you have a tablet, is to save the PDF and open it in a drawing app like Procreate or the Apple Notes markup tools on an iPad, then colour the squares with your finger or a stylus. No printing, no waste, and you can undo, which pencils sadly do not let you do.
Either way, when your grid is coloured in, you have a pattern. Count how many beads of each colour it uses, and you are ready to shop.
🎨 Get the grids
Both grids live in my free resource library, along with every other printable I have made, the sewing planners, the pricing calculator, all of it. Pop your email in and I will send you the link and password, and they are yours to print as often as you like.
🧮 Bead Gram Calculator
Caramba Crafts · Beading tools
Bead Gram Calculator
Your pattern counts beads. The shop sells grams. Type in the bead count from your chart, one row per colour, and this works out how many grams, how many tubes, and roughly what it will cost.
The bit I keep coming back to
I started beading to make one specific thing, and I got waylaid by a whole craft I did not expect to love. The macaw is still on my list. My daughter still says guacamaya, still proud, still slightly wrong, and I still fully intend to hang a pair of beaded ones from my ears one day and show her.
But there is something about lining up tiny glass beads one at a time, watching a picture appear a row at a time, that has become its own reward on the evenings when nothing else will sit still. Whimsical despite the horrors, as ever.
If you make a design of your own, I would genuinely love to see it. Show me your grid, show me your colourways, show me the wonky first attempt, all of it. Tag me @caramba.crafts so I can cheer you on, and so I can steal your colour combinations.