10 Easy Cricut Joy 2 Halloween Crafts You Can Save for Next Year
I bought myself a Cricut Joy 2 for my birthday this year. Cricut happened to be running a 20th anniversary offer at the time, and I ended up with a free heat press thrown in, which felt like exactly the kind of sign I needed to finally stop putting this off.
Here’s the slightly embarrassing bit. It’s been sitting on my craft shelf since then, more or less untouched. I’ve had a couple of goes at simple paper cuts and made some vinyl name decals for my daughter’s lunch box, and that’s genuinely it. No grand projects, no real sense yet of what this machine can actually do. That part’s coming, I promise, there’ll be a proper post soon on how I’m getting on with it once I’ve put it through its paces properly.
But Halloween doesn’t wait for me to feel ready, and it’s one of my favourite times of year to decorate for, Halloween and Christmas both, if I’m honest. What I don’t love is the bit that comes after the decorating. Every year I buy a few cheap bits from the seasonal aisle, half of them snap or fray or lose their stick within a week, and by next October I’m back in the same aisle buying it all again. It’s wasteful, it adds up, and none of it ever feels like mine.
So this year is different. I’ve got a Cricut sitting right here, a stash of faux leather I’ve been meaning to use, and an early start, it’s only the beginning of September as I’m writing this, which gives me a proper run at getting everything made and finished well before the 31st. The plan is to make things worth keeping. Nothing that ends up in the bin on the 1st of November.
There’s a bit of outside accountability behind this too. I’ve recently joined a Discord full of women scattered all over the world who, like me, seem to have collected far too many hobbies for one lifetime, and this month’s group challenge is to work through the craft supplies we already own instead of buying anything new. This post is that challenge in practice, not just a nice idea I’ve attached to it after the fact. Every project on this list comes from things already sitting in my stash, and somewhere out there a group of women I’ve mostly never met are cheering me on as I tick each one off the list. Strangers on the internet rooting for you to finally use up that faux leather is a nicer kind of motivation than I expected.
Why reusable Halloween decorations are worth the extra effort
A shop-bought garland or a pack of window clings is quick, I won’t pretend otherwise. But most of it is built to survive one October, not ten. Vinyl decals peel and reapply. Faux leather and cardstock hold their shape in a box in the loft. A wood sign with a bit of vinyl lettering on it comes back out every single year exactly as it went in.
The other thing I like about this approach is that it’s mostly stuff I already have, or can buy once and use for years of Halloweens rather than one. A sheet of faux leather goes a long way across two different projects. A roll of window cling vinyl covers three. That’s a very different equation to buying a fresh bag of plastic decorations every September.
Where these ten ideas actually came from
I’m new to the Cricut, but there are people who’ve been doing this for years, properly, brilliantly, and with a level of patience I clearly still need to build. So rather than guess my way through Halloween as a total beginner, I went looking for the bloggers who’ve made this their thing, had a proper dig through what they’d made, and picked ten projects that would work on my machine specifically.
That last part mattered more than I expected. The Joy 2 is the smallest machine Cricut makes, a 4.5 inch cutting width, no fabric mat, nothing too thick or too big. A lot of the most popular Halloween Cricut roundups lean on projects built for the bigger Explore or Maker machines, so a fair few ideas I liked got quietly ruled out once I checked the actual material size against what my machine can manage.
What’s below is the shortlist that survived that check: ten projects from ten different corners of the Cricut blogging world, every one small enough for the Joy 2, and every one built to be reusable rather than binned after one Halloween. Full credit and a link to the original tutorial sits under each one. If an idea below is one you love, please go and give the original creator some love too, that’s exactly where the real how-to and the free cut files live.
What you’ll need across this list
A few things come up again and again through these ten projects, so it’s worth having them sorted before starting on any of them.
The machine and mat
A Cricut Joy 2 and the free Design Space app. A single StandardGrip mat covers everything on this list, vinyl, faux leather and cardstock all use it, so there’s no need for a second mat type this time.
Removable Window Cling vinyl
This is the material behind three of the ten projects (the bats, the mason jar and the wine glass decals), and it’s worth having a proper roll of it rather than trying to reuse offcuts of ordinary adhesive vinyl, which won’t peel cleanly the same way.
Adhesive vinyl and transfer tape
For the pumpkin decal designs and the wood sign lettering, both permanent applications rather than removable ones.
Faux leather, paper thin
For the bat earrings and the garland. This is the one material worth double-checking against what you actually own before cutting, the Joy 2 only handles genuinely paper-thin faux leather, so give it a bend test first. If it feels at all stiff or heavy it’s more likely built for the bigger machines. Cricut’s own faux leather sheets are a safe bet if your stash turns out too thick.
Faux suede
A separate material from faux leather, used for the spider web earrings specifically.
Cardstock
For the straw toppers.
A small pre-made wood sign blank
Not a Cricut product, so it’s sourced separately, and it means no cutting or building the sign itself, just the vinyl lettering.
Earring findings
Jump rings and ear wires for both earring projects.
Twine and an embroidery needle
For stringing the faux leather garland together.
Battery tealights
For the mason jar, since a painted or vinyl-decorated jar shouldn’t go anywhere near a real flame.
A weeding tool and small sharp scissors
Round out the basics for every project on the list.
The 10 projects
1. Reusable straw decorations, for silicone straws
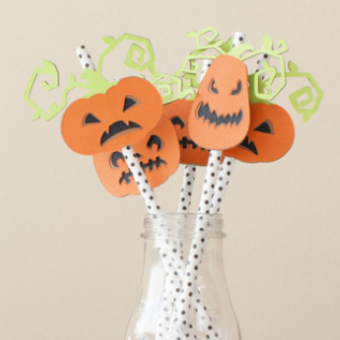
Most straw decoration tutorials are built to be glued on and thrown away with the straw. This one isn’t. The idea and the general shape come from Awesome Alice’s Halloween roundup, and the actual wrap-and-glue technique is borrowed from Dinosaur Mama’s straw topper tutorial (written for Valentine’s, but it transfers directly). Cut a small Halloween shape, bat, ghost, spider, whatever suits, with a small rectangle tab at the base. Instead of gluing that tab into a fixed ring the way most versions do, size it as a snug sleeve that slides onto a silicone straw and stays put by friction alone. No glue touching the straw itself, so it rinses clean with the straw and packs away for next year. Cardstock holds the wrapped shape better than vinyl here.
2. Spider web pinwheels
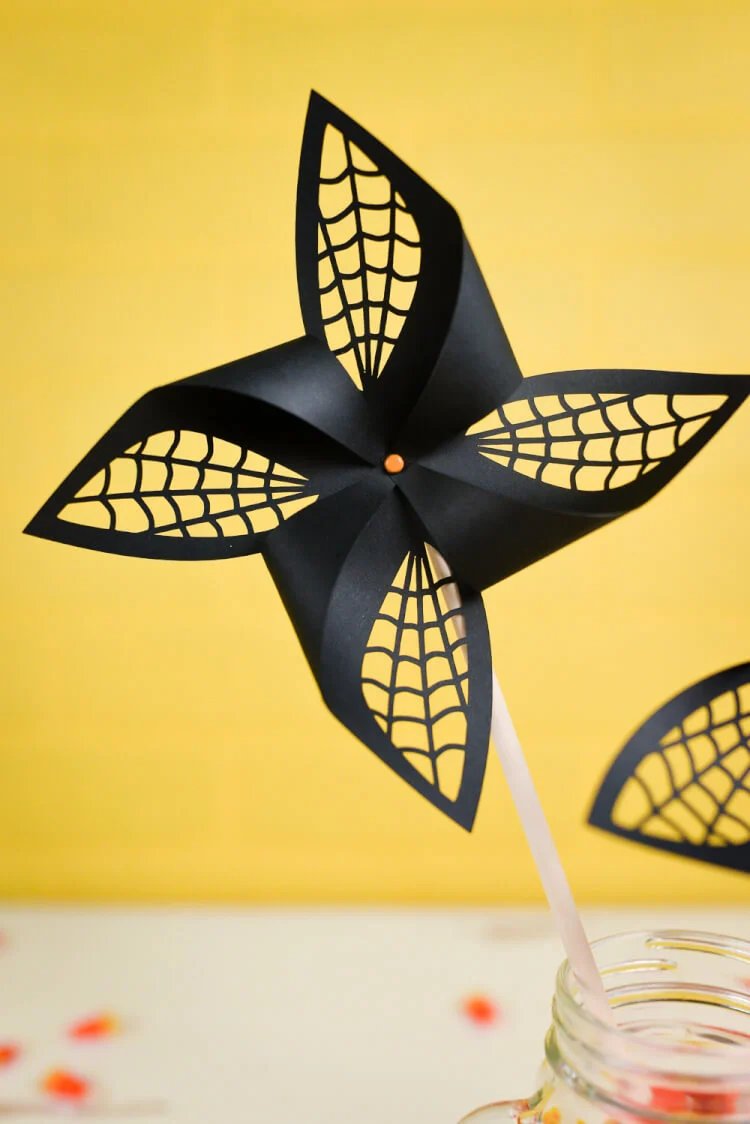
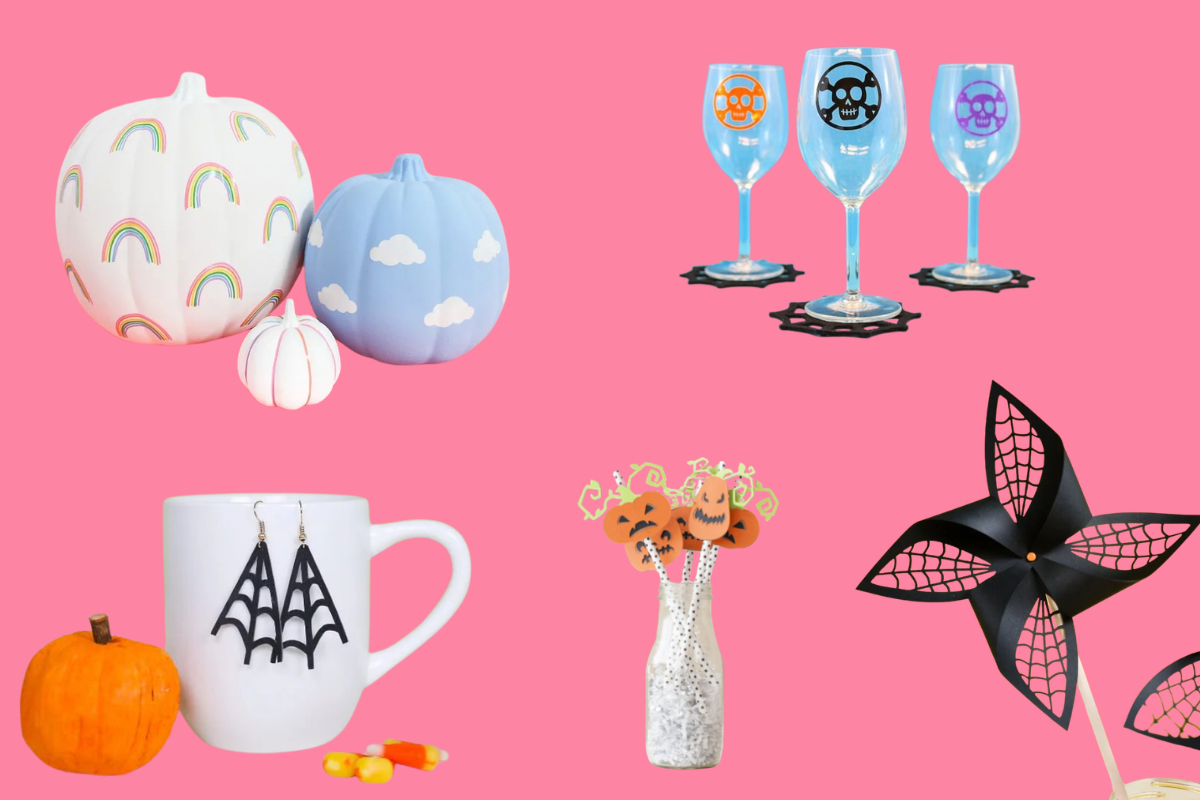
A proper paper pinwheel, not a vinyl decal, from Hey, Let’s Make Stuff. I’ve earmarked this one for the garden rather than indoors, it catches the wind nicely on a stake by the front path, and a laminated or well-sealed pinwheel comes in at the end of the month and goes straight back in the decorations box.
3. Spider web earrings
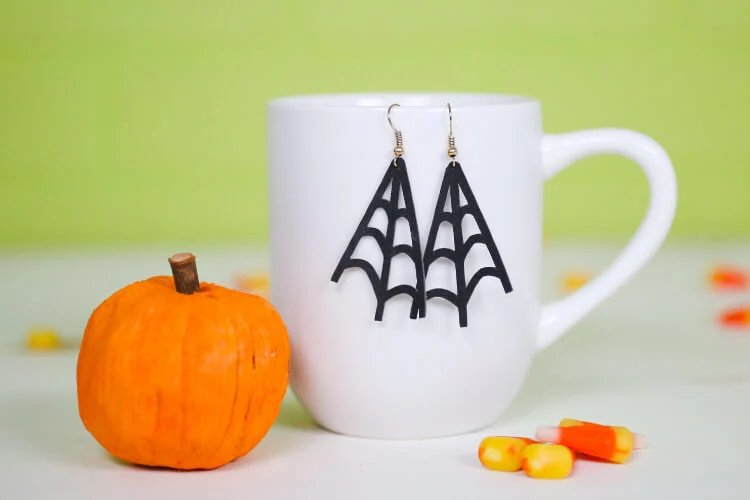
Also from Hey, Let’s Make Stuff, cut from faux suede and finished in under 10 minutes according to the original post. Small enough that a single scrap piece covers a pair, and unlike a lot of the vinyl projects on this list, these are proper jewellery you’d wear well past Halloween if the colour’s right.
4. Faux leather bat earrings
Adapted from a bat shape within Jennifer Maker’s faux leather earring collection. Her own post confirms this works on a Joy specifically, so long as the faux leather is genuinely thin and taped down to a standard grip mat with painter’s tape rather than left loose. A good pairing project with the spider web earrings above, since both use the same findings and roughly the same technique.
5. Halloween window cling bats
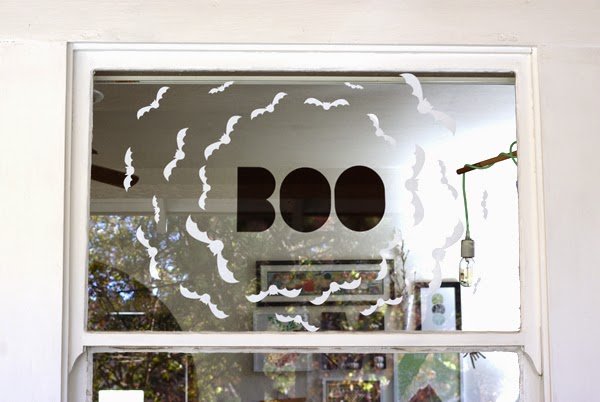
Genuine Cricut Window Cling material, resized down from the porch-window scale shown in the original tutorials to something that suits the Joy’s narrower mat. I’ve drawn on the technique as shown by Oleander + Palm and a more recent version from At Home With Ashley. The whole point of window cling as a material is that it’s built to be removed, it peels off in one piece and goes back onto its backing sheet for storage, so the bats come out every October rather than getting scraped off a window in November.
6. Rainbow and clouds pumpkin decals
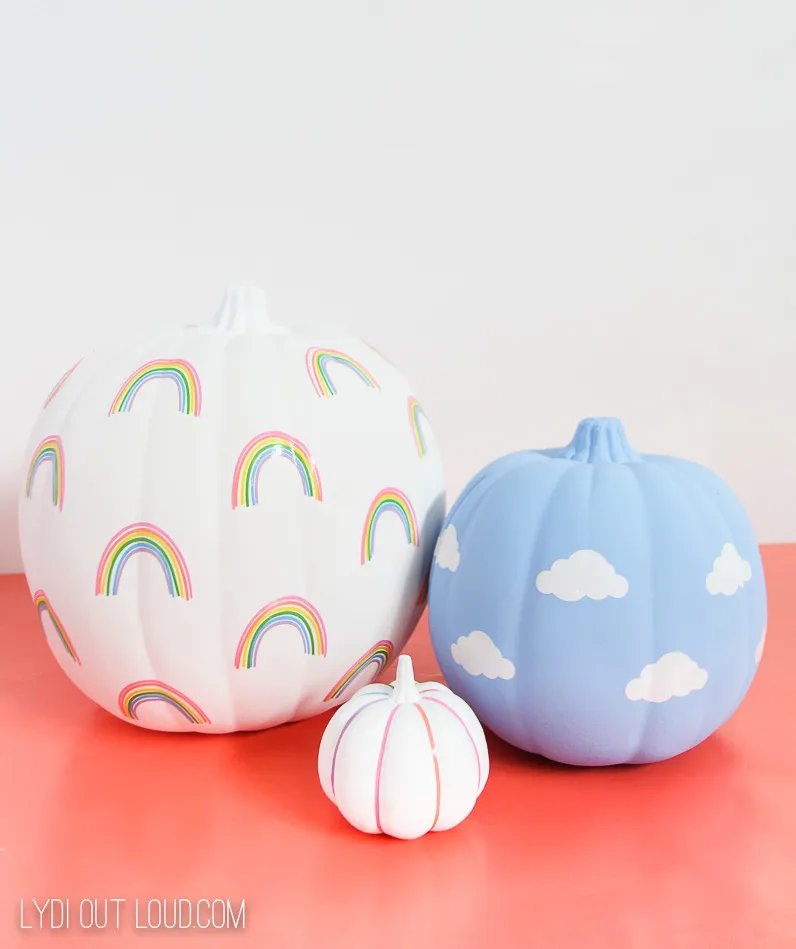
A set of no-carve vinyl decals for pumpkin decorating from Lydia Out Loud. These go on a real or faux pumpkin and peel off cleanly afterward, so a faux pumpkin in particular gets to do this every year without ever being carved or ruined.
7. Minimalist faux leather garland
This is the one built specifically around the faux leather I already have at home. The stringing technique comes from Laura Radniecki’s faux leather leaf garland, which threads store-bought faux leather leaves onto twine with an embroidery needle in a simple running stitch, no glue and no punched holes needed. I’m swapping her leaves for my own Joy-cut shapes, small bat silhouettes, plain crescent moons, or a repeat of simple triangle bunting flags, whichever cuts cleanest, then stringing them the same way. Confirmed cuttable on the Joy 2 using Design Space’s own “Faux Leather (Paper Thin)” setting, no custom pressure fiddling required, which makes this genuinely one of the easier projects on the list despite how it looks.
8. A small wood sign, vinyl lettering only
Sourced from Creative Ramblings, and worth calling out specifically because it’s written for the Joy rather than adapted from a bigger machine after the fact. A pre-made, pre-painted or stained wood sign blank does the heavy lifting, the Cricut only cuts the vinyl lettering, applied with transfer tape. The source notes no single letter needs to be taller than 5 inches and any one cut element just needs to stay under the Joy’s 4.5 inch width, pieced together on the sign rather than cut as one block for longer phrases. A simple “Trick or Treat” or “Happy Haunting” suits this well, and it’s the kind of sign that earns a permanent spot in the decorations box rather than getting repainted every year.
9. Removable mason jar tealight holder
The general technique for putting vinyl on a jar comes from Dear Creatives, who recommends permanent vinyl for durability. For this one I’m using Cricut’s removable Window Cling material instead, the same as the bats above, sized to a small half-pint jar so the whole design clears the Joy’s width comfortably. A battery tealight goes inside once the decal’s on, never a real flame near a decorated jar, and because the vinyl peels cleanly off glass, the jar goes right back to being an ordinary jar once November arrives.
10. Reusable wine glass decals
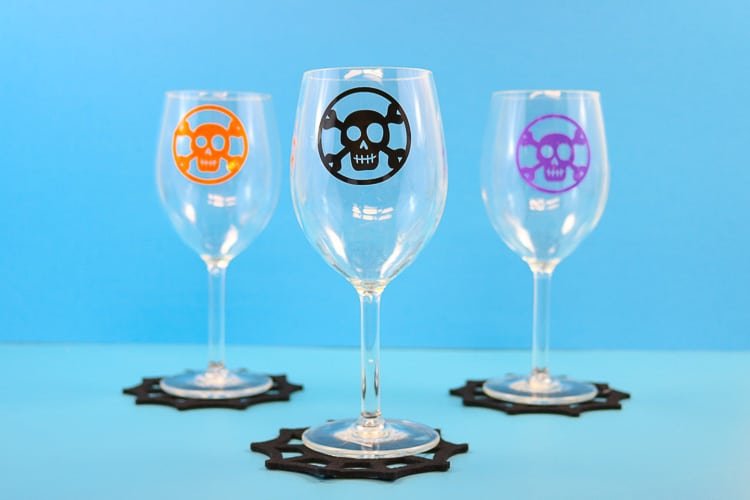
From That’s What {Che} Said, and genuinely built around the idea of not committing an entire set of glasses to one theme. Window Cling vinyl again, small Halloween motifs sized to sit on the bowl of a wine glass, peeled off after the party and stuck back onto their liner sheet for next year. A nice one to finish a Halloween gathering on, since it turns ordinary glasses festive for one evening without changing what they are the rest of the year.
FAQ
Do all of these really work on the smallest Cricut machine? Yes, every project above was checked specifically against the Joy 2’s 4.5 inch cutting width before it made the list. A few popular Halloween Cricut ideas got left off entirely because the source itself confirmed they needed a Cricut Maker or Explore, thick craft foam, or a full sheet of chipboard with the Knife Blade, none of which the Joy 2 can do.
What makes a Halloween craft “reusable” rather than single-use? Mostly the material and how it’s applied. Anything using Window Cling vinyl peels off cleanly and restores to its backing sheet. Faux leather, cardstock and a wood sign blank all just get packed away in a box. None of the ten above are treat bags, food wrappers or anything else built to be binned once the night is over.
Is September really not too early to start? Not for this list. None of these are quick five-minute jobs when you count design time, cutting, weeding and assembly across ten separate projects, so starting in early September with a proper run at it before Halloween felt like the sensible choice rather than trying to squeeze all ten into the last week of October.
Ten crafts, one small machine, and hopefully a decorations box that looks the same in five Octobers as it does this one. Every idea above belongs to the blogger who made it first, so if one of these catches your eye, go and give them a follow, a comment, or a save, they’ve earned it.
I’d love to know what you liked best, what you actually made, and if you’re reading this after Halloween’s already been and gone, tell me what you’re planning to make next year instead. Tag @caramba.crafts, I read every single one.
Image credits
Every project in this post is credited and linked at the point it’s introduced above, rather than gathered into a separate list, since each one needs its own explanation anyway. As a reminder for whoever’s checking before publishing: all ten links go to the original creator’s own tutorial page, not to a direct file or image, so readers land wherever that blogger wants them to land, including any of their own email-gated freebie files.